In Unreal Engine, there are better options for managing your game’s assets than throwing them all into a monolithic Data Table or creating unlimited BP subclasses of items and characters. This article will provide detailed examples of how the Asset Manager and primary assets can be used to create a scalable asset management schema for your project.
This article assumes basic knowledge of C++ and Unreal’s API. We’re going to build out a schema for an example item type later.
Data-driven design in Unreal
Data-driven programming is a design pattern wherein many containers of often immutable and pure data are stored separately from and interpreted and processed by a class which performs functionality based on the data in the container.
To skip straight to a more concrete example relevant to Unreal, say you’re creating a game with several items. The non-data-driven approach would be to create AItem → ASword → AFlamingSword. You would hardcode values onto each subclass.
This approach is not scalable. It doesn’t offer any features for asset management and requires that programmers with intimate knowledge of the item system to be the ones to create new assets when in a team this job would normally be delegated to gameplay designers, level designers, and artists.
The data-driven approach would be to create a single AItem class, then create several UItemDefinition classes which contain fields like DisplayName and ItemMesh. Then, you can always spawn the same AItem and inject any UItemDefinition into the item without creating dozens or hundreds of subclasses. Additionally, designers can create new items in a similar manner to other assets in the Editor through the right click menu and only see the relevant properties that they need to set up to create an item.
This will be elaborated on with more detailed examples further in this article.
Foreword on Data Tables
Monolithic Data Tables are usually the first method of asset management that users are exposed to. They’re a first step towards data-driven design and an improvement over every asset in the game being represented as a BP subclass. However, using Data Tables in this way has significant limitations.
Info
This is not a complete write-off of Data Tables for all purposes, just asset management specifically. Data Tables (and Curve Tables) are still useful for holding non-monolithic simple or textual data when using many small DTs. The main consideration is not to try to reinvent the Asset Manager inside your Data Table when Epic already did the work for you. Read below.
Data Tables are often abused for managing assets
Data Tables are just uassets that contain a list of the FDataTableRowBase-based struct that you picked. They are dumb and have no concept of asset management. They are the equivalent of creating a single asset with TArray<FItemData> and using that one asset as one big glued-together ball of every other asset in your game project.
Often in beginners’ projects, this means that when the giga DataTable is loaded, all of the hard referenced assets in the game are also loaded into memory, often synchronously as well which will hang the game thread and freeze the application. This isn’t sustainable for a project with more than a handful of small assets and there is no ergonomic reason to use this approach when Data Assets exist.
Even if you have the wherewithal to create an asset management system using soft pointers to the heavy assets inside the Data Table and asynchronously load them, you’ll end up re-building the Asset Manager and Primary Asset IDs from scratch when the system already exists in the engine with superior designer tooling.
Two people can’t work on a Data Table at once
Because of the high number of non-mergeable binary assets in a game project, most opt to use exclusive checkout via Perforce or Git with Git LFS. This means that if one person is editing a Data Table that contains all of your items, nobody else can edit items. This creates a serious bottleneck for teams larger than one person trying to work in parallel on content.
One workaround to this problem could be to use smaller Data Tables, maybe even one for each item’s asset. However at this point you might as well use Data Assets which are purpose-built for exactly this usecase and offer many other advantages.
Introduction to the Asset Manager and Primary Assets
UAssetManager and “primary assets” are Epic’s built-in system for managing and asynchronously loading assets that both the editor and shipped games can take advantage of. Levels (maps) are a default type of primary asset included with the engine and are already registered as primary assets in the project settings by default. This section will teach you how to add your own with the pre-made UPrimaryDataAsset base class and load them asynchronously with bundles using the Asset Manager. My example project is a Third-Person Template project named Sandbox but you should use the name of your project.
Warning
This guide assumes that you’re not trying to live code new reflected types into the editor and following the safe C++ workflow
Adding a new primary asset type
Adding the Item Definition class
First, we’ll define the pure data that will make up our items in a UPrimaryDataAsset subclass that we’ll call USandboxItemDefinition:
// SandboxItemDefinition.h

#pragma once

#include "CoreMinimal.h"
#include "Engine/DataAsset.h"
#include "SandboxItemDefinition.generated.h"

UCLASS()
class SANDBOX_API USandboxItemDefinition : public UPrimaryDataAsset
{
	GENERATED_BODY()

public:
	inline static const FName NAME_VisualsBundle = "Visuals";

public:
	UFUNCTION(BlueprintGetter)
	FText GetDisplayName() const { return DisplayName; }

	UFUNCTION(BlueprintPure)
	UStaticMesh* GetMesh() const { return Mesh.Get(); }

private:
	/** The user-facing name of this item. */
	UPROPERTY(EditAnywhere, Getter, Category="Info")
	FText DisplayName;

	/** Mesh for this item in the world. */
	UPROPERTY(EditAnywhere, Category=Visuals, meta=(AssetBundles="Visuals"))
	TSoftObjectPtr<UStaticMesh> Mesh;
};
Implementation Notes
- Everything is private - In data-driven design, data is meant to be immutable. The actor that we’ll add shortly will hold mutable state, but the definition of the base item should never change.
- The
GetMeshgetter is a different type than theMeshproperty - The Asset Manager will handle loading the mesh asset for us, so accessors do not need to know about or care how the mesh is internally stored. - The NAME_VisualsBundle bundle constant - The
AssetBundlesmeta can’t contain variables or macros because UHT doesn’t unwind them, but we can use constants everywhere else to enforce name safety instead of typing “Visuals” all over our codebase. Usage examples will be shown later. - We don’t have to override
GetPrimaryAssetId-UPrimaryDataAssetalready has an implementation that returns the “best” common class name among subclasses + the asset name, i.e.ItemDefinition:I_AssetName.
Creating the unified Item class
Now, we’ll create the class that represents our item and processes the data inside the Defintion. This class will likely not need to be subclassed in BP in the future.
// SandboxItem.h

#pragma once

#include "CoreMinimal.h"
#include "SandboxItemDefinition.h"
#include "GameFramework/Actor.h"
#include "SandboxItem.generated.h"

UCLASS()
class SANDBOX_API ASandboxItem : public AActor
{
	GENERATED_BODY()

public:
	ASandboxItem();

public:
	UFUNCTION(BlueprintGetter)
	UStaticMeshComponent* GetMeshComponent() const { return MeshComponent; }

	UFUNCTION(BlueprintGetter)
	const USandboxItemDefinition* GetDefintion() const { return Definition; }

	UFUNCTION(BlueprintSetter)
	void SetDefinition(const USandboxItemDefinition* InDefinition);

private:
	/** Callback for when we're done loading the visuals bundle. */
	void OnVisualsBundleLoaded();

private:
	UPROPERTY(VisibleAnywhere, BlueprintGetter=GetMeshComponent)
	TObjectPtr<UStaticMeshComponent> MeshComponent;

private:
	/** Internal definition of this item */
	UPROPERTY(VisibleInstanceOnly)
	TObjectPtr<const USandboxItemDefinition> Definition;
};
// SandboxItem.cpp

#include "SandboxItem.h"

#include "Engine/AssetManager.h"

ASandboxItem::ASandboxItem()
{
	MeshComponent = CreateDefaultSubobject<UStaticMeshComponent>("MeshComponent");
	SetRootComponent(MeshComponent);
}

void ASandboxItem::SetDefinition(const USandboxItemDefinition* InDefinition)
{
	// Check if the incoming definition is not nullptr or marked for garbage collection
	if (!IsValid(InDefinition))
	{
		return;
	}

	// Set the internal definition reference
	Definition = InDefinition;


	// Create our callback that will be called when loading the visuals bundle is completed
	FStreamableDelegate Callback = FStreamableDelegate::CreateUObject(this, &ThisClass::OnVisualsBundleLoaded);

	// Begin loading the visuals bundle (which includes the mesh) and pass our callback that will be called when loading is complete
	UAssetManager& AM = UAssetManager::Get();
	TArray<FPrimaryAssetId> Ids = { Definition->GetPrimaryAssetId() };
	TArray<FName> AddBundles = { USandboxItemDefinition::NAME_VisualsBundle };
	TArray<FName> RemoveBundles;
	AM.ChangeBundleStateForPrimaryAssets(Ids, AddBundles, RemoveBundles, false /* bRemoveAllBundles */, Callback);

	// The Visuals bundle will now begin asynchronously loading on another thread. We'll return to our callback (OnVisualsBundleLoaded) when it's done.
}

void ASandboxItem::OnVisualsBundleLoaded()
{
	// Check if our definition is still valid
	if (!IsValid(Definition))
	{
		return;
	}

	// Get and check if our definition has a valid and loaded mesh
	UStaticMesh* NewMesh = Definition->GetMesh();
	if (!IsValid(NewMesh))
	{
		return;
	}

	// Set our mesh
	MeshComponent->SetStaticMesh(NewMesh);

	// Unload the visuals bundle. We are now retaining a strong reference to the mesh, so we don't want the Asset Manager keeping the mesh alive forever
	// (even after this ASandboxItem is destroyed)
	// The semantics of "Load"/"Unload" are very unintuitive, but this will be explained later in the article.
	UAssetManager& AM = UAssetManager::Get();
	TArray<FPrimaryAssetId> Ids = { Definition->GetPrimaryAssetId() };
	TArray<FName> AddBundles;
	TArray<FName> RemoveBundles = { USandboxItemDefinition::NAME_VisualsBundle };
	AM.ChangeBundleStateForPrimaryAssets(Ids, AddBundles, RemoveBundles, false /* bRemoveAllBundles */);
}
Create a Blueprint Function Library for handling our items
The last part of the C++ implementation will be creating a Blueprint Function Library that contains functions that make it easier to spawn items without users of our API having to think about details like remembering to set the item definition after spawning the actor.
Info
Even though it’s called a Blueprint Function Library, it’s perfectly acceptable to use the functions in it in C++. You can even create static non-reflected functions here so all of your library functions for a feature live in one class.
The only thing inheriting BPFL does it make the reflected function callspace global so the
UFUNCTION-marked functions can be accessed from anywhere. Otherwise, it’s a completely normal class.
// SandboxItemLibrary.h

#pragma once

#include "CoreMinimal.h"
#include "SandboxItem.h"
#include "Kismet/BlueprintFunctionLibrary.h"
#include "SandboxItemLibrary.generated.h"

UCLASS()
class SANDBOX_API USandboxItemLibrary : public UBlueprintFunctionLibrary
{
	GENERATED_BODY()

public:
	/** Convenience function to spawn an item using a SandboxItemDefinition */
	UFUNCTION(BlueprintCallable, Category="Sandbox|Items", meta=(WorldContext=WorldContext))
	static ASandboxItem* SpawnItem(UObject* WorldContext, const USandboxItemDefinition* Definition, FTransform Transform);
};
// SandboxItemLibrary.cpp
#include "SandboxItemLibrary.h"
ASandboxItem* USandboxItemLibrary::SpawnItem(UObject* WorldContext, const USandboxItemDefinition* Definition, FTransform Transform)
{
// Get the world to spawn the actor in from our WorldContext
UWorld* World = GEngine->GetWorldFromContextObject(WorldContext, EGetWorldErrorMode::LogAndReturnNull);
if (!IsValid(World))
{
return nullptr;
}
// Spawn the actor
FActorSpawnParameters Params;
ASandboxItem* NewItem = World->SpawnActor<ASandboxItem>(ASandboxItem::StaticClass(), Transform, Params);
if (!IsValid(NewItem))
{
return nullptr;
}
// Set the definition on our new actor
NewItem->SetDefinition(Definition);
// Return the completed actor
return NewItem;
}
Since we just added a bunch of new reflected types, properties, and functions, make sure you compile from your IDE and we’ll move on to setting up our new asset type in the editor.
Setting up the asset type in the editor
You’ll now be able to create new Item Definitions in the right click menu via Miscellaneous > Data Asset.

Before you do that though, you still need to add an asset entry so that the Asset Manager picks up the new asset type for the Asset Registry.
Adding our new asset type to the Asset Manager
Navigate to Project Settings > Game > Asset Manager. The first property in this settings panel is Primary Asset Types to Scan. These are the types of assets and directories in which the Asset Manager will scan and add to the Asset Registry so we can access them during runtime by their Primary Asset ID. Add the Item Definition entry like so:

Now, when you add a new Item Definition to the Items directory, the Asset Manager will be able to find it.
Important
If you have your IDE attached to the editor process, it’s very likely that when you click the plus button to add a directory path to scan to the array you’ll hit an ensure which will breakpoint in your IDE. This happens because the default path is empty but this isn’t valid. It’s an oversight on Epic’s part and you can safely step over it in the debugger to resume the application.
Important
If you experience issues where a newly-added asset is unable to be found by ID, try restarting the editor. Sometimes the Asset Registry lags behind in updating.
Using our new Item Definitions
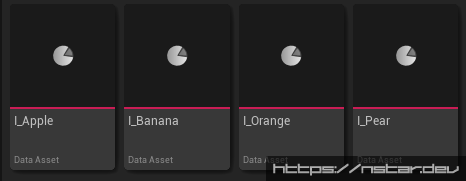
In /Game/Items, right click and navigate to Miscellaneous > Data Asset

Create a new Sandbox Item Definition
In my case, I’ll name the new item I_Apple

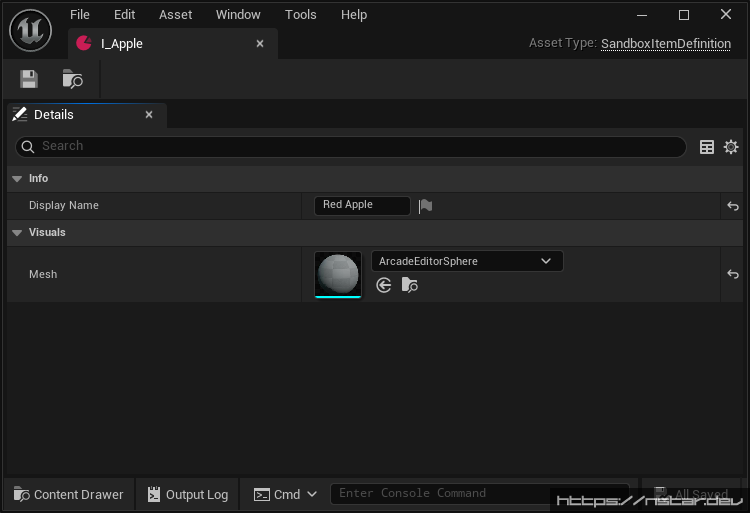
Configure the item like so. We won’t use the DisplayName in this tutorial, but we defined getters that will allow you to easily use them in your project.
For the sake of example, I’m going to modify the BP_ThirdPersonCharacter blueprint in order to demonstrate how to load an item and spawn it using the API we created.
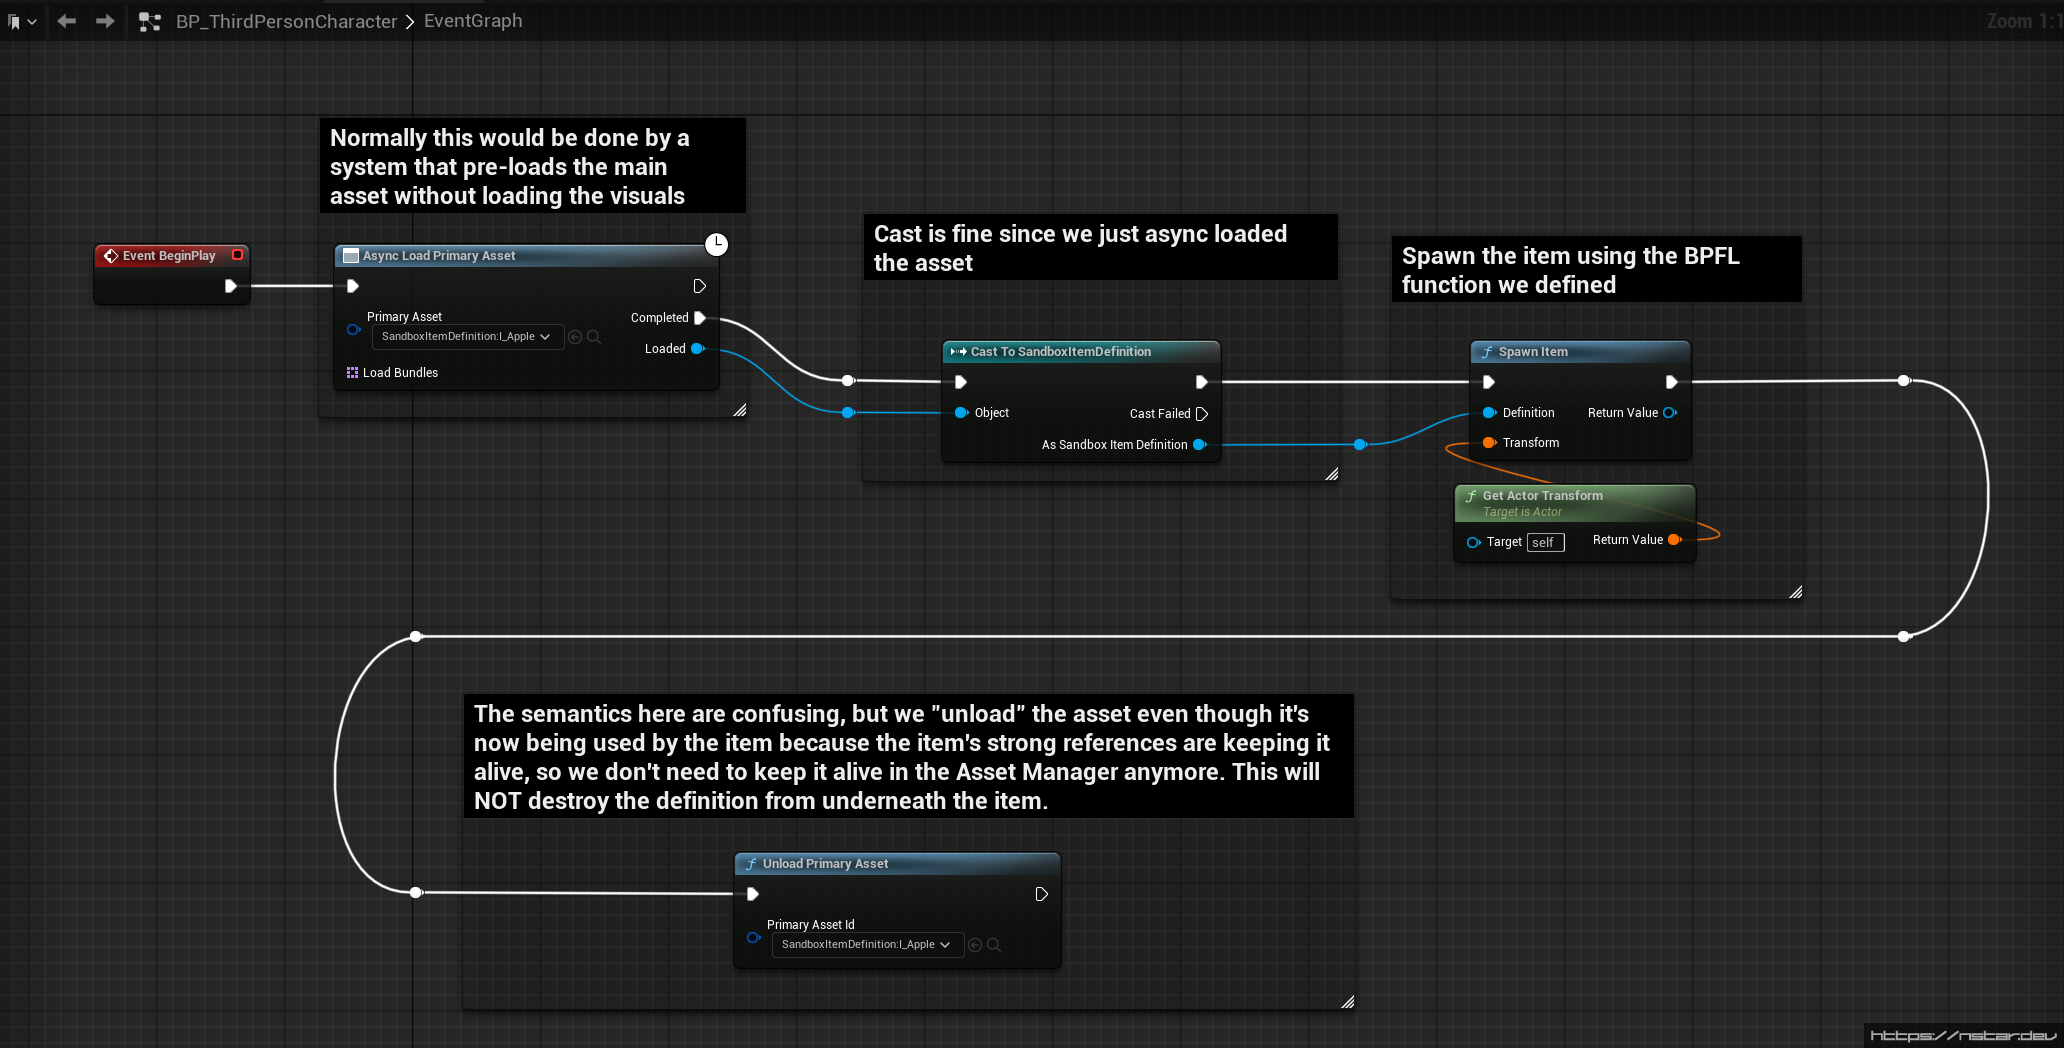
Important
To reiterate on the comment in the BP; when loading an item using the asset manager, the item will stay in memory forever, even if we don’t have any active strong references outside of the Asset Manager itself. This is usually undesirable as it interferes with the automatic memory management of
UObjects in general, thus we “unload” the asset immediately after handing it to the new item actor. This will not destroy the definition or “unload” it from underneath the item actor, as the item sets up its own strong reference that will keep the Definition “alive” on its own. “Unload” is a very misleading term used by the Asset Manager API.
Important
For those aware of how
FStreamableHandlefrom the streamable manager works, you would think that the returned streamable handle’sReleasefunction would be enough to get rid of the strong refs inside the SM/AM. It’s not. The AM doesn’t even ask the SM for a managed handle. It keeps its own references in its own system. See above for why we have to “unload” assets after we successfully load and assign them elsewhere.
Now when we PIE, the “apple” should appear next to our character:
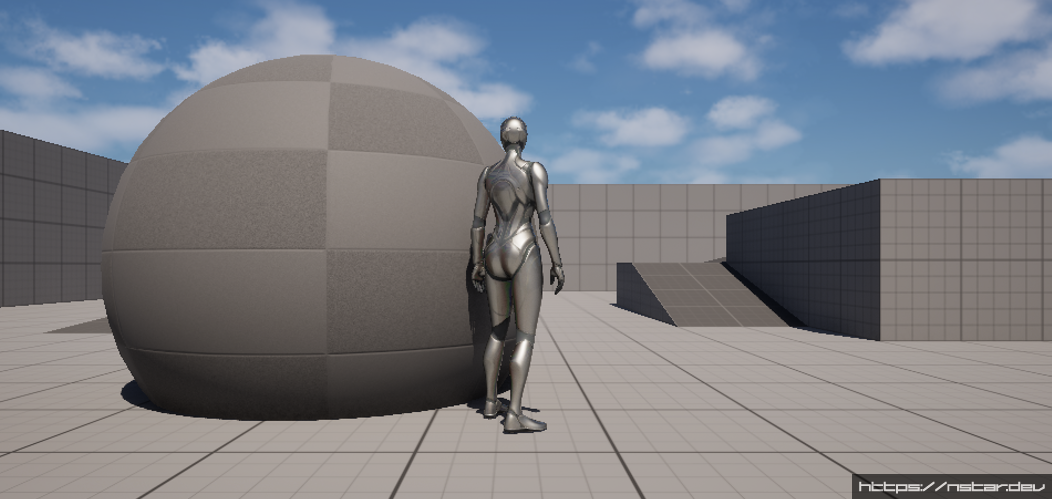
That’s a big-ass apple.
Conclusion
The example of asset management in this article is only meant to show the basics and is by no means exhaustive. Most projects will require much more sophisticated asset management schemes tailored to their requirements.
This sample is missing the commonly-needed feature of pre-loading the basic asset (i.e. predicting what items are going to need to be loaded in the level) so that other classes only have to worry about loading their bundles. The implementation of this feature is usually highly-specialized to your game project’s needs, so I deliberately omitted the implementation here.